
Here is a quick tutorial on how to re-purposed some of those old pillow cases into a large shopping tote.
Or if you are like me and your regular sheets aren't the most fun fabrics head on over to Goodwill to look for bright and fun pillowcases to make into a large tote.
Or if you are like me and your regular sheets aren't the most fun fabrics head on over to Goodwill to look for bright and fun pillowcases to make into a large tote.

(Here's a tip: Sheets/pillowcases are really just huge pieces of fabric that can be used for tons of sewing projects. Next time you see a bright colorful sheet set think about how it might look as drapes, or throw pillow, or even a custom shower curtain. The possibilities are endless, and the price/yard is usually a great deal!)
Supplies you'll need:
- 1 pillow case (regular or queen)
-seam ripper
-scissors
-scissors
- sewing machine
You'll start by ripping out both side seams and the end seam if necessary. All the pillow cases I own are really just one piece of long fabric folded in half so there probably won't be a third seam at the bottom to rip out.
After the side seams are ripped out fold the fabric back in half and lay it flat on the table. You will make two cuts here. The first is to cut the fabric in half along the fold at the bottom. And a second cut diagonally through the rectangular pieces. To do this you will need to cut diagonally from the lower right corner to the upper left corner. After both of these cuts are done you should have 4 right angle triangle shaped pieces of fabric.
Here is what the pieces will look like after one has been flipped upside down to show the shape of the tote.

Next step is to iron and sew a hem on the angled edge of all 4 pieces.

Now you will need to sew the front and back of the bag together. Line up each piece with the right sides together and sew the two side seams and the bottom seam to form the bag.
Once the front and back are sewn together you can stop here, or add box pleat corners like I did. Adding box pleats is super easy and I like the squared off look it gives this large tote.
To make box pleat corners you will need to sew one seam in each corner perpendicular to the seam that made the bottom of the bag. The length of the seam is up to you, but I used 3" as my guide for this project.

Once the box pleats are done all you need to do is turn the bag right side out and tie the two sides together for the strap.
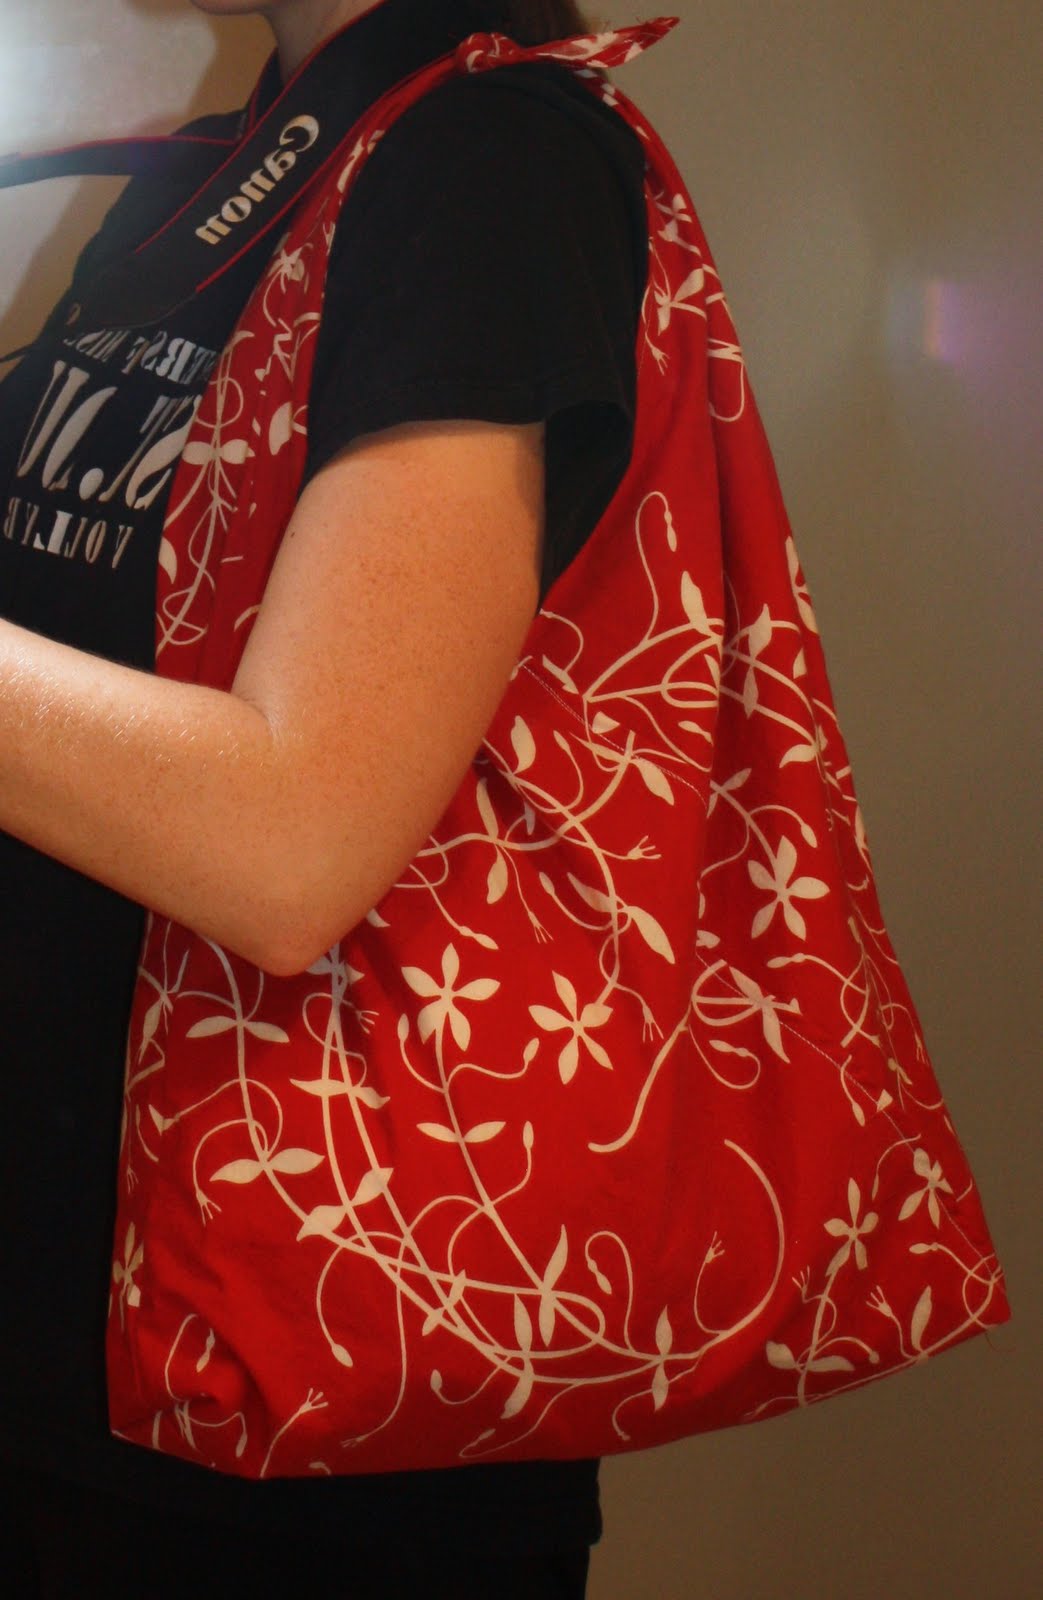
And that's all there is to it. A few cuts and sewing a few seams and you have a reusable (and cute) large shopping tote.
I hope you can find the time to make one!


.JPG)
.JPG)
.JPG)
.JPG)
.JPG)
.JPG)


